Streaming live video from Rasspberry pi to Azure Media Services
Few weeks ago I bought raspberry PI 2 Model B to my elder kid to encourage him to program something and start hacking. And as it often happens I also started to explore new toy and its capabilities. Since I am working in Azure Media services as developer, first project I actually started to implement myself is building security camera which will stream live video through Azure Media Services. I can look what’s happening around my house from work or from any place where I have access to internet. Looking into device specs and browsing similar projects I concluded that I should be able to archive my goals relatively fast and I started with hacking.
Hardware
- Raspberry PI 2 Model B
- SD Card 16 GB
- Microsoft LifeCam 6000/ Raspberry PI Camera module
- USB wifi adapter if you don’t have wired Ethernet connection
- Keyboard (optional)
- Mouse(optional)
- Monitor(optional)
You don’t actually need to plugin monitor, keyboard , mouse if you planning to access your PI from your computer
via SSH.
You can use either a usb camera or Raspberry PI Camera module. You should get better results with Raspberry PI Camera
module since it has a dedicated bus with better throughput compare to usb connection.

Configuring required software
Installing Ubuntu Mate
I decided to install Ubuntu Mate instead of Raspbian based on minimal requirements of Mate in order to have full desktop experience for my kids and potentially wider variety of GUI tools. Ubuntu Mate has image optimized for PI.Since I used Ubuntu once a while,I decide to make it my default OS for Raspberry PI .
Minimum requirements from Ubuntu Mate web site:
- Pentium III 750-megahertz
- 512 megabytes (MB) of RAM
- 8 gigabytes (GB) of available space on the hard disk
- Bootable DVD-ROM drive
- Keyboard and Mouse (or other pointing device)Video adapter and monitor with 1024 x 768 or higher resolution
- Sound card
- Speakers or headphones
Raspberry PI Specs:
- A 900MHz quad-core ARM Cortex-A7 CPU
- 1GB RAM
- 4 USB ports
- 40 GPIO pins
- Full HDMI port
- Ethernet port
- Combined 3.5mm audio jack and composite video
- Camera interface (CSI)
- Display interface (DSI)
- Micro SD card slot
- VideoCore IV 3D graphics core
To write iso image to sd card in Windows simply follow instructions from
https://www.raspberrypi.org/documentation/installation/installing-images/windows.md.
Once OS installed you need to configure SSH for remote access, Wifi and make sure that you able to browse internet.
Enabling RaspberryPi camera module in Ubuntu Mate
modifyfile /boot/firmware/config.txt
sudo nano /boot/firmware/config.txt
Just add a line “start_x=1” at the bottom of the file config.txt, save it, and reboot the system.
Try command “sudo raspistill -o test.jpg” to see if it is working
Installing FFMPEG
FFMPEG is powerful tool to work with video and able to encode and push encoded video to live stream channels.
I found and follow instructions from
Jeff Thomson blog post which explains how to build ffmpeg for ARM processor and have hardware acceleration turned
on.
By defaults you will not have hardware acceleration if you will download precompiled binaries from ffmpeg site.
So you need to get source code and compile it for Raspberry PI.
Here is a summary of steps you need to perform:
Install build tools
sudo apt-get install makeinfo texinfo texi2html automake
Compile amd install H264 libraries:
cd /usr/src

git clone git://git.videolan.org/x264

cd x264

./configure --host=arm-unknown-linux-gnueabi --enable-static --disable-opencl

sudo make

sudo make install
Compile amd install FFMPEG:
git clone git://source.ffmpeg.org/ffmpeg.git

cd ffmpeg

sudo ./configure --arch=armel --target-os=linux --enable-gpl --enable-libx264 --enable-nonfree

sudo make

sudo make install
Testing ffmpeg and Camera module:
Once you have all software
Configuring Live channel In Azure Media Services
Now you have to provision Azure media services services and create live channel.
- Go to https://azure.microsoft.com and create account if you don’t have one. There are free trial offers available to play
- Provision Azure Media Services account

Provision Azure Media Services Account
- Create Live Channel
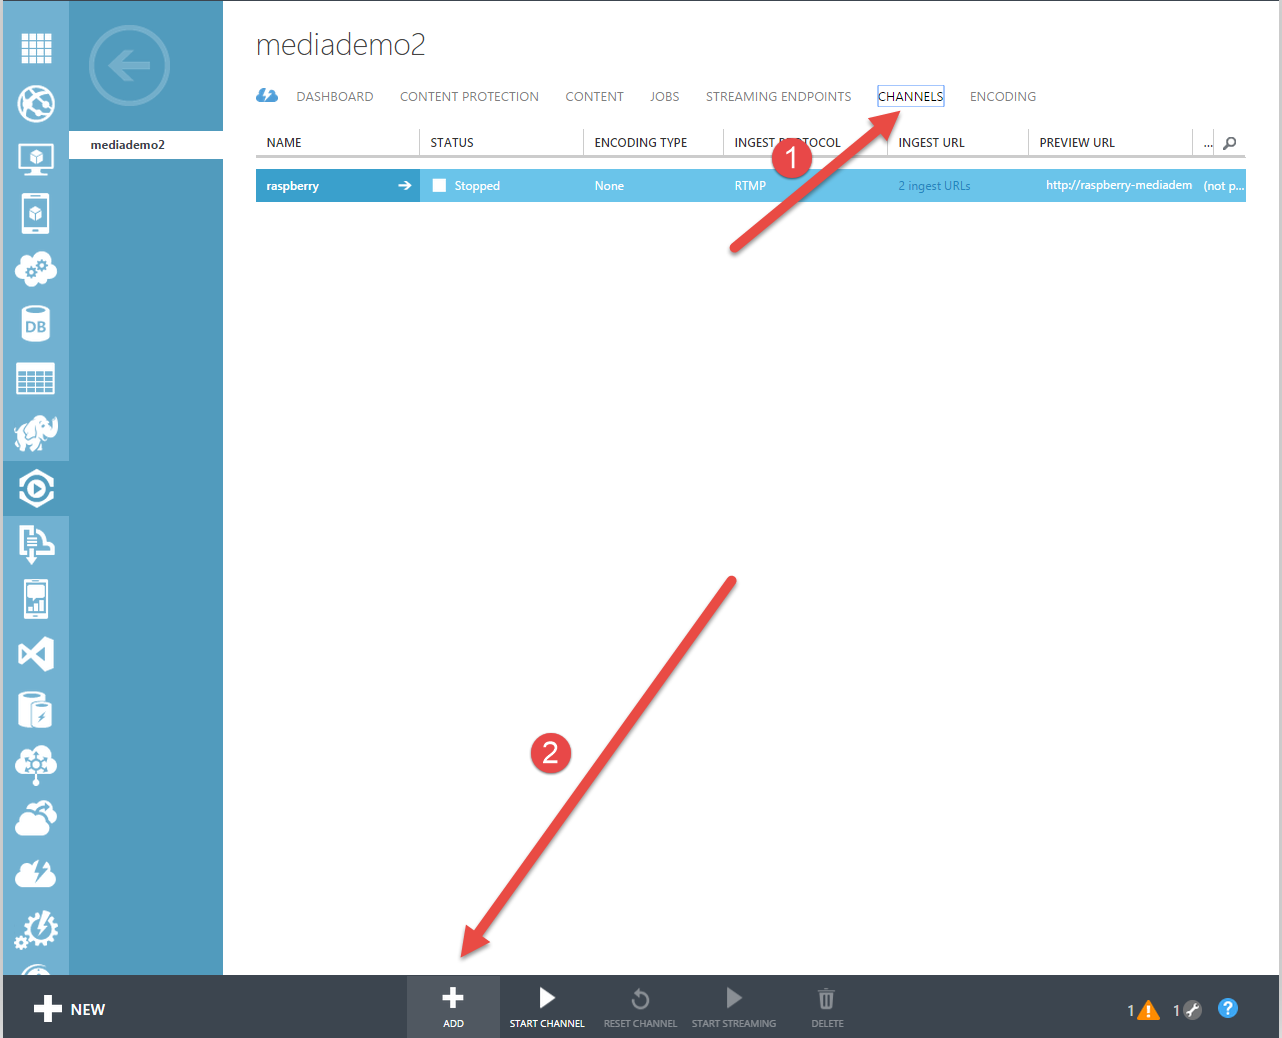
Create Azure Media Services Channel For RaspberryPI
- Specify Channel name and description
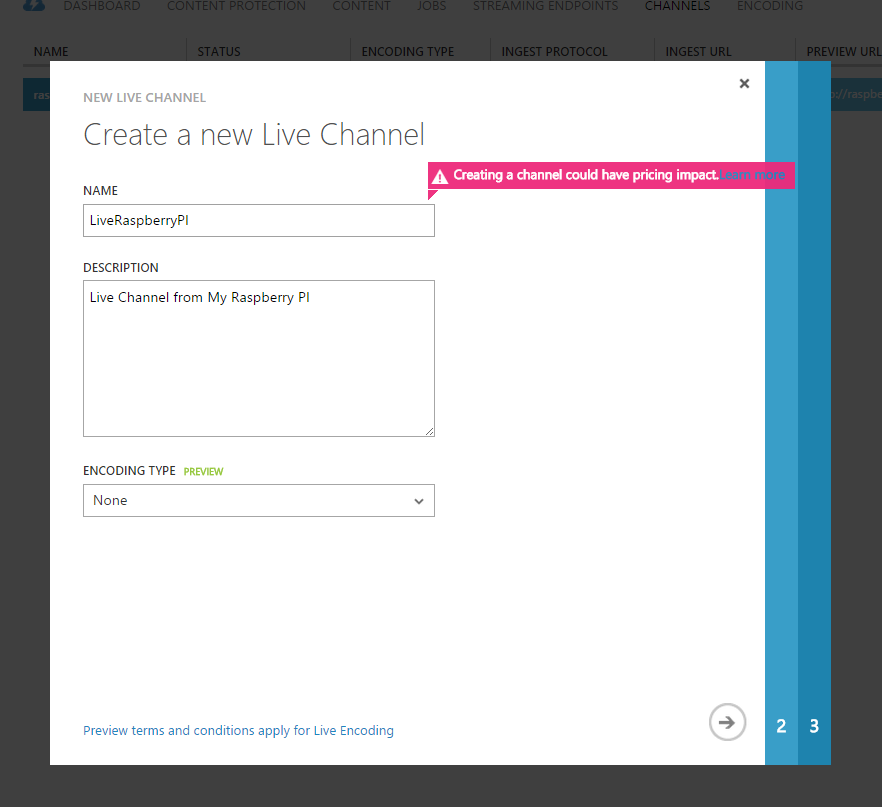
Specify Azure Media Services Channel Properties
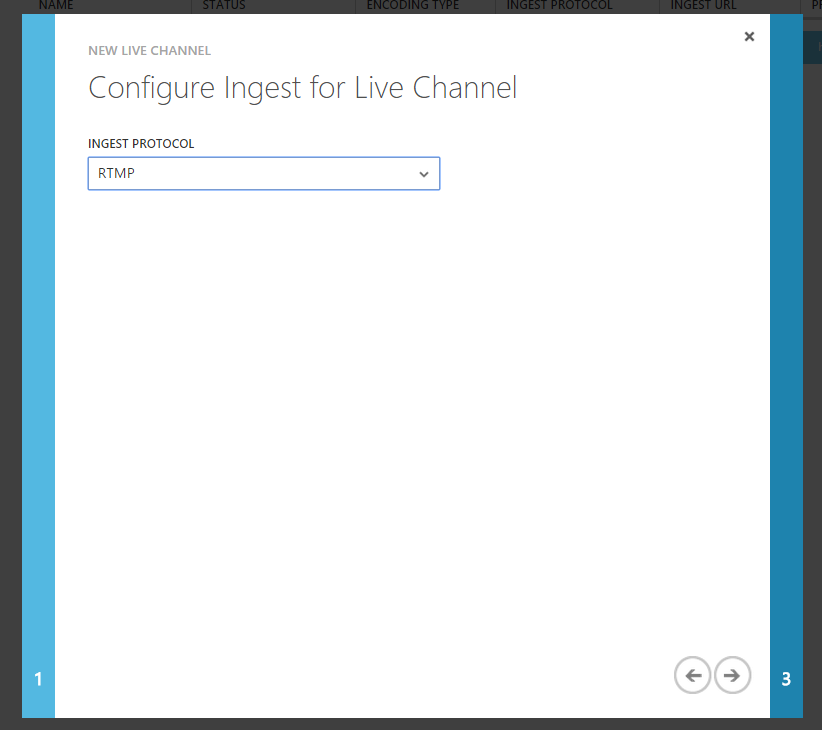
- Select RTMP ingest protocol

- Specify ingest restrictions
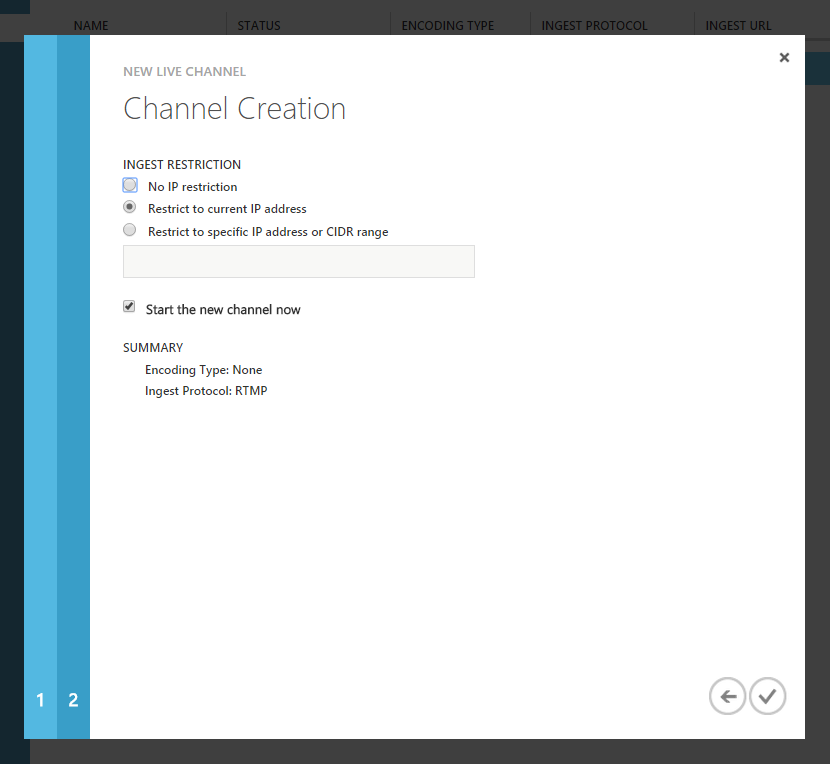
Live channel ingest restrictions
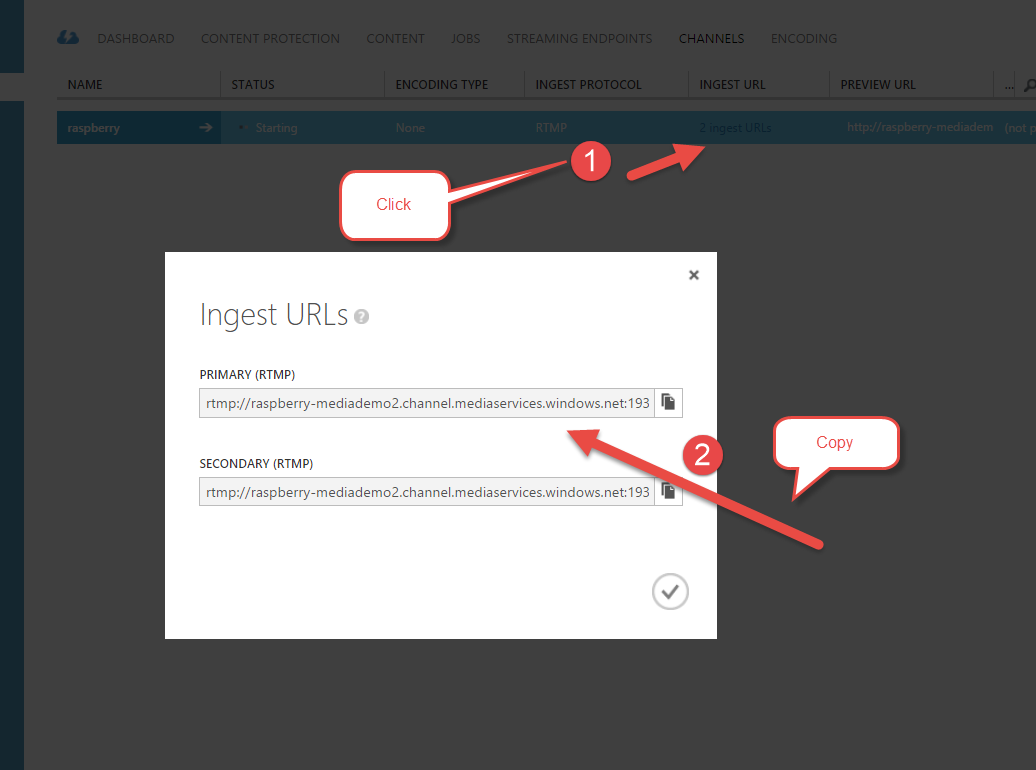
Copy Live Stream Ingest Urls


Pushing live stream from Raspberry Pi to Azure Media Services live channel
At this point you have all your hardware,software configured and prepared, live channel is ready to get a live stream
from your Raspberry PI device.
It is time to start streaming. I created a simple bash script which using ffmpeg to stream from camera.
nano ~/azure_ffmpeg
#!/bin/bash
modprobe bcm2835-v4l2
INGESTURI=”Paste live channel ingest url here from Azure Media Services”
while :
do
ffmpeg -framerate 30 -r 30 -s 640×480 -i /dev/video0 -vcodec libx264 -preset ultrafast -acodec libfaac -ab
48k -b:v 500k -maxrate 500k -bufsize 500k -r 30 -g 60 -keyint_min 60 -sc_threshold 0 -f flv $INGESTURI
sleep 10
done
chmod u+x ~/azure_ffmpeg
sudo ~/azure_ffmpeg
We created a script ~/azure_ffmpeg. modprobe bcm2835-v4l2 maps PI camera module as /dev/video0 device. if you are using
usb camera then you don’t need this line.
Then we are launching ffmpeg and telling it to stream video from /dev/video0 device to our channel with 500k bit
rate using ultrafast preset of libx264 codec. We are also instructing to use audio codec since as of now Azure Media
Services requires to have both video and audio to be streamed to channel.
Once script is created and saved chmod command is used to grant script execution permissions. Finally sudo ~/azure_ffmpeg
launching stream processing.
While script is running you can preview it and publish through portal. Publisher url is url you can share with world to watch your Raspberry PI live stream.

Preview Azure Media Services live stream

What next
In this article i showed you how you can use portal to configure and start live channel. My next steps will be create scripts, so i can manage live channels though raspberry PI itself. So stay tuned.